MICROSTOC M3 - Licensed Trade Stocktaking Software
The new website will be coming soon
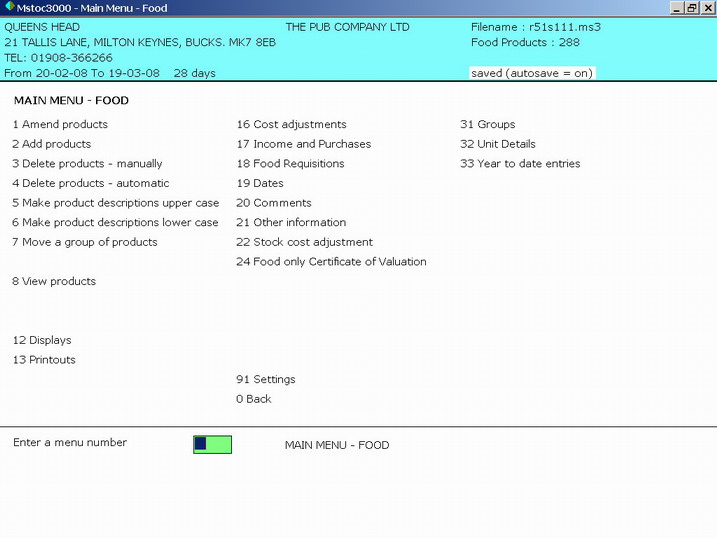
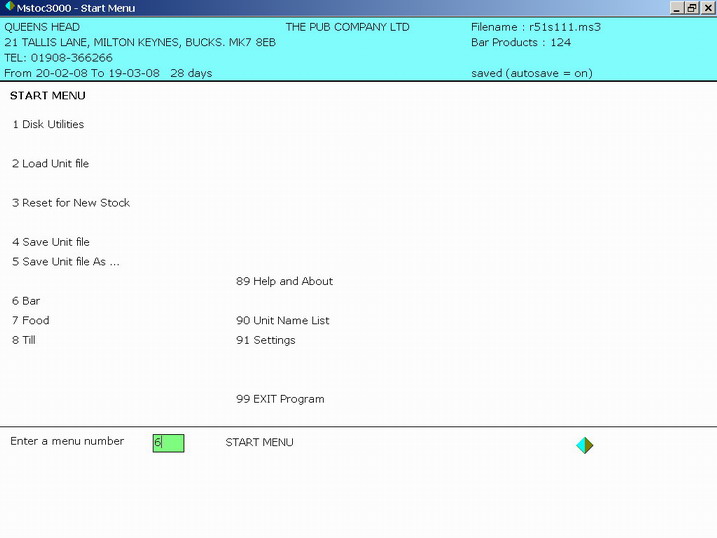
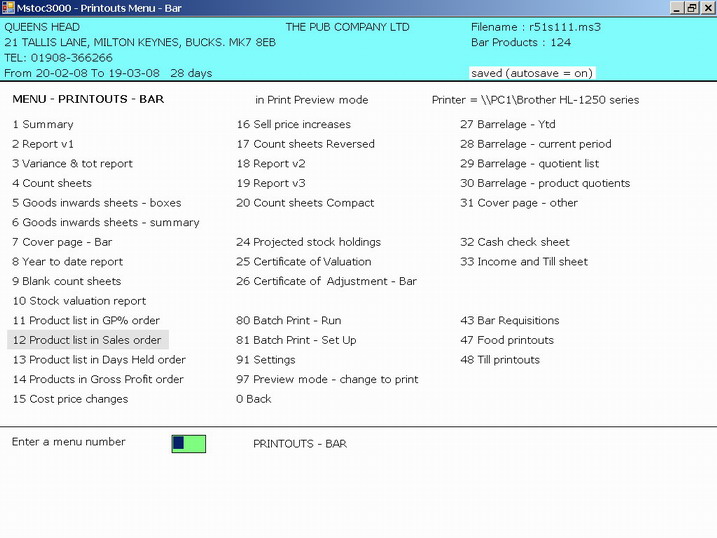
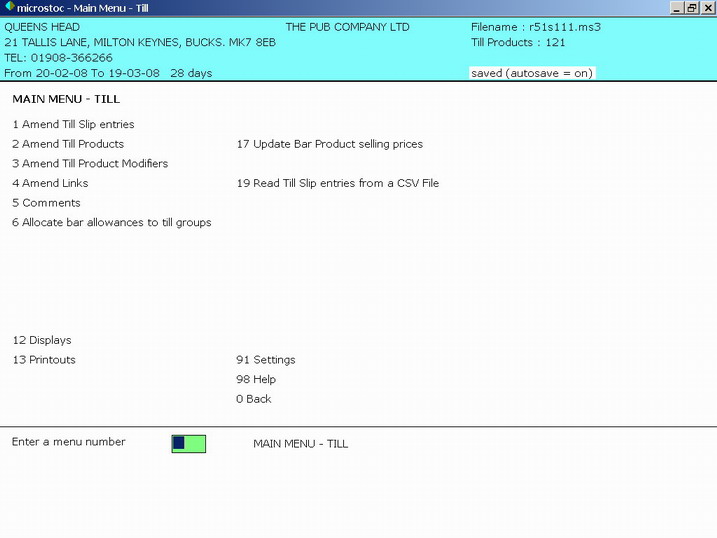
Each menu option is numbered.
To select a menu option, either click on the text or enter the menu number in the box.
The sequence for completing an extended stock result is :
[A] select menu option 2.Load Unit File - and load last times result data
[B] select menu option 3.Reset for new stock - do this once, to set the file ready to accept this times stock data
[C] select menu option 6.Bar - there you can enter the bar data for this times result
[D] select menu option 7.Food - there you can enter the food data for this times result
[E] select menu option 8.Till - there you can enter the till data for this times result
Each Pub or Outlet is known as a Unit.
To work with a particular period you have to specify the Unit Ref number, and the Stock Period number you want to work with.
A file is created on disk for each stock period result.
You can easily pass these small files to other stocktakers.
You can have up to 999 Units and up to 999 stock periods for each Unit.
You can load and save any period file at any time. You can go back and revise prior period results.

Click on menu option "0 Back" or type 0 (quicker) to go back along the menus to the start menu.
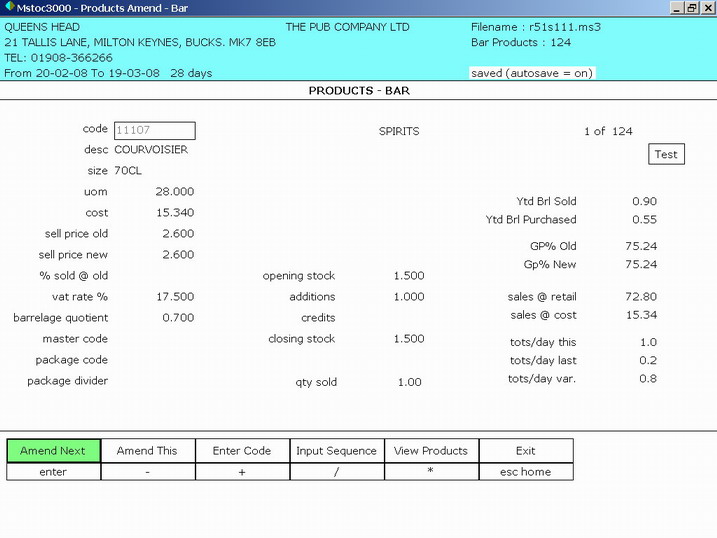
Consider the screen as being divided into 3 areas.
The top section displays general details related to the current file that you
are working on.
The middle section is where the majority of data is input and displayed.
The bottom section is where menu-strips, messages and shorter inputs appear.
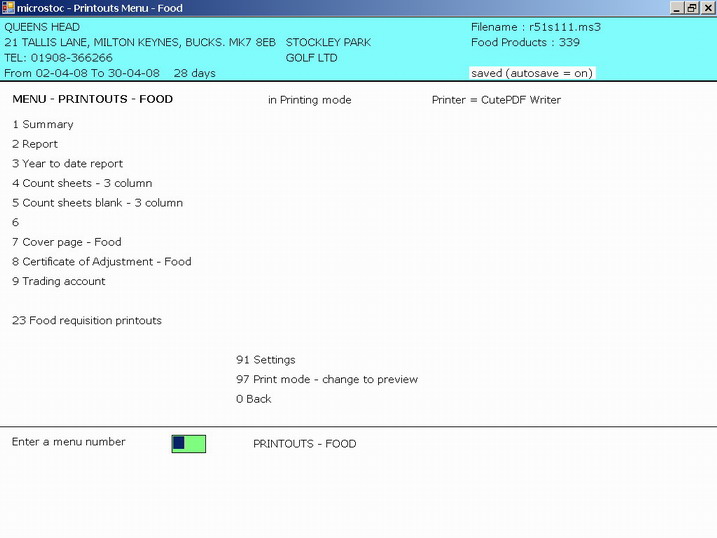
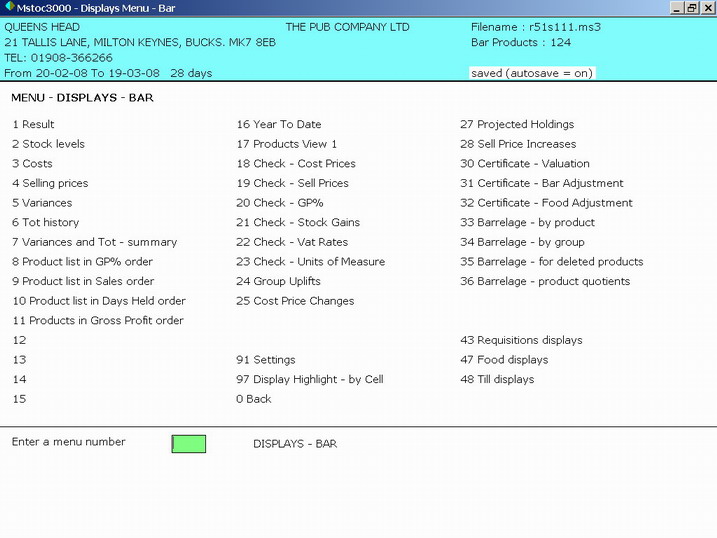
There are lots of displays, so you
can view and check all data before printing.
Notice the menu option 80.Batch Print.
You can set the system up to automatically print a different set of printouts for each Unit (pub/outlet).
For example, for The Bell PH you can press 80.Batch Print and the system will
print one Cover Page, two Summaries,
two Reports, one Ytd report, one Count Sheets, one Cash Check sheet, and one
Till and Income sheet all in one go and
in the order that you want.
There are further printouts on other menus. You can add your logo at the top of
the sheets.
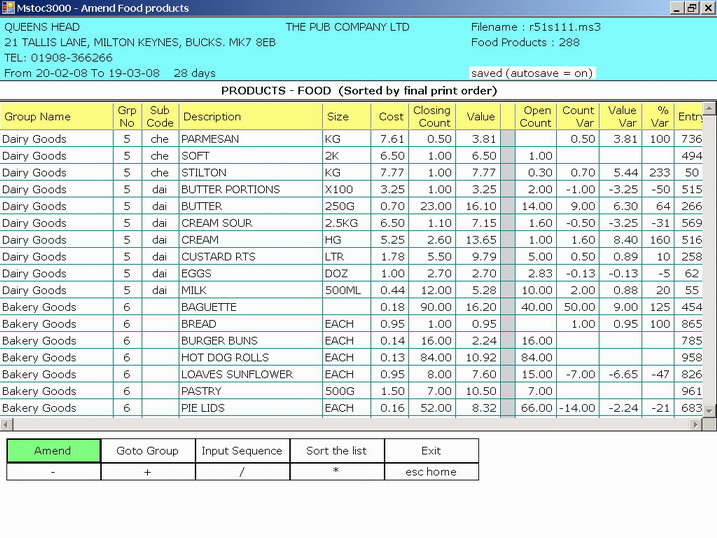
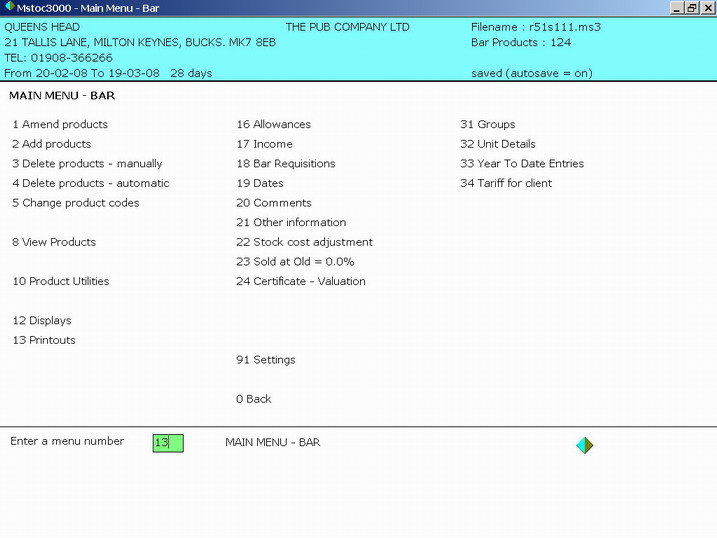
Notice the menu-strip at the
bottom of this screenshot.
On this screen you can use the mouse and click on the boxes in the menu-strip to
start Amending the data, or to View or Exit etc
Alternatively you press the [*] key on your keypad to View, or press the [/] to
set the input sequence etc
Use the 'Input Sequence' option to choose one or more fields to enter data into.
For example, you can select to enter data into the 'closing stock' field only,
then run down your count sheets and enter closing stocks.
You could select to enter data into the 'new sell price' field, then run down
your count sheets and update the prices.
Or, you can select a combination of fields.
You can perform calculations as you enter data i.e. you can enter
1.25+1.4+1.65+1.9 in any field and the final entry will be calculated for you..
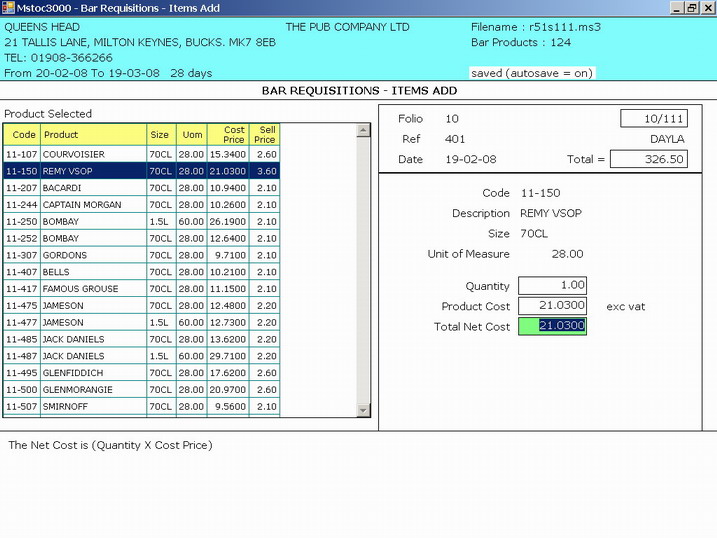
Bar - Add products to a Requisition
Deliveries can be entered
manually, or via the Requisitions system (recommended).
First you have to create a Requisition, and then add product items to it.
The requisition here is invoice number 401, dated 19-02-08. The total cost of
items (products) that have been
added to this requisition so far is 326.50. This is requisition 10 in period 111
(10/111).
Remy Vsop has been selected from the product list and is currently being added
to the requisition.
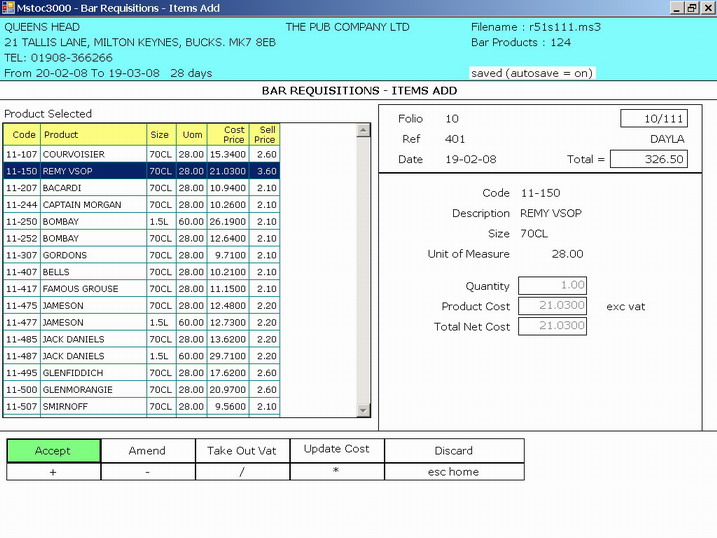
Bar - Add products to a Requisition 2
You can navigate either by using
the mouse or (quicker) by using the keyboard.
Notice the menu-strip at the bottom of this screenshot.
You can click on the boxes in the menu-strip to Accept the data or Amend the
data or Exit etc.
Alternatively you press the [+] key on your keypad to Accept, or press the [-]
key to Amend etc.
Remy Vsop has been selected from the product list, and a delivery of 1 has been
entered.
The menu-strip has appeared and you have the option to Accept this delivery,
Amend it or Discard it etc.
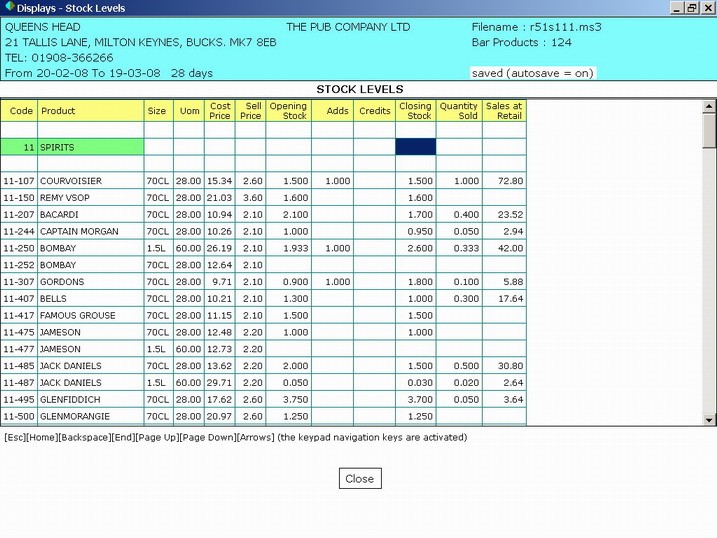
There are lots of displays, so you
can view and check all data before printing.
For most displays, the arrow keys on the numeric keypad are automatically
activated for you. This enables you to
quickly move about and view data.
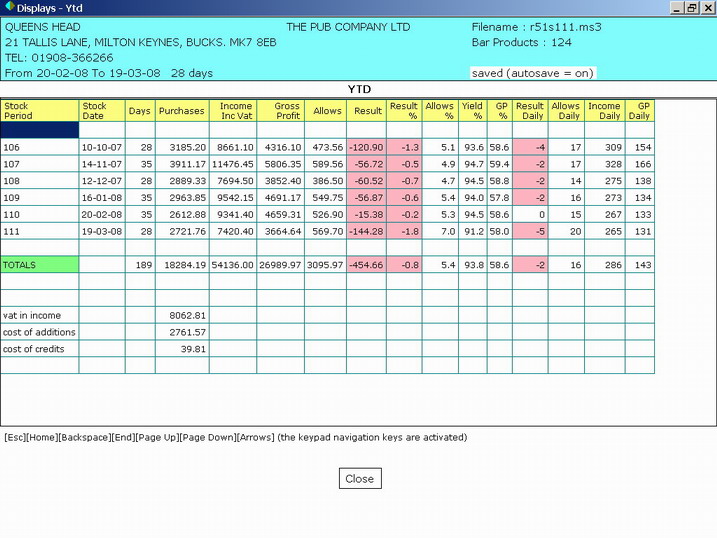
There are lots of displays, so you
can view and check all data before printing.
For most displays, the arrow keys on the numeric keypad are automatically
activated for you. This enables you to
quickly move about and view data.
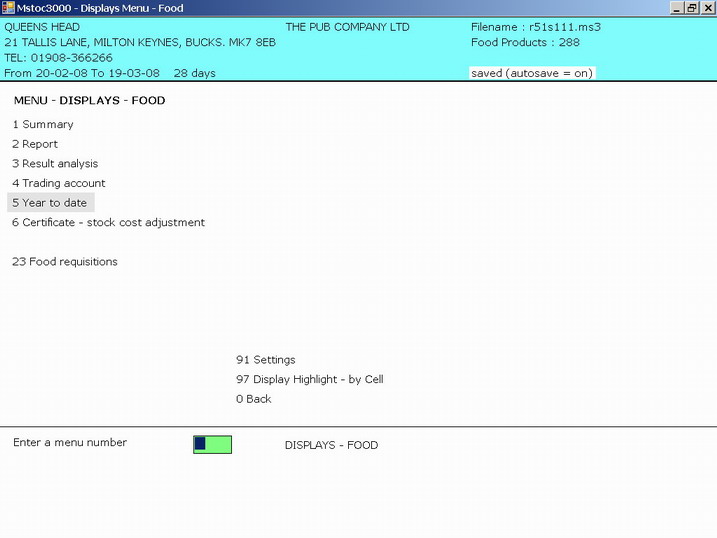
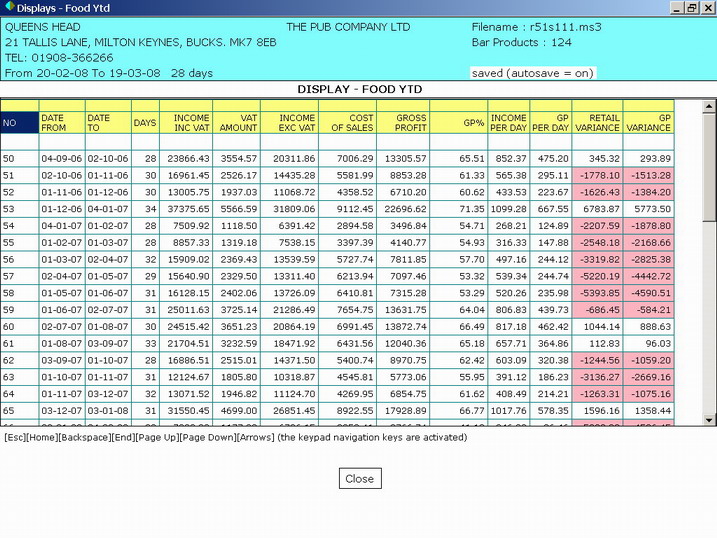
Displays - Food - Year To Date
There are lots of displays, so you
can view and check all data before printing.
For most displays, the arrow keys on the numeric keypad are automatically
activated for you. This enables you to
quickly move about and view data.
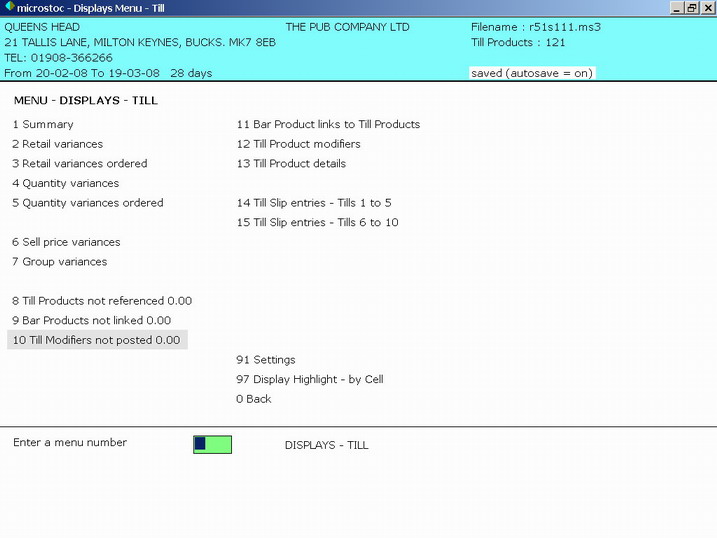
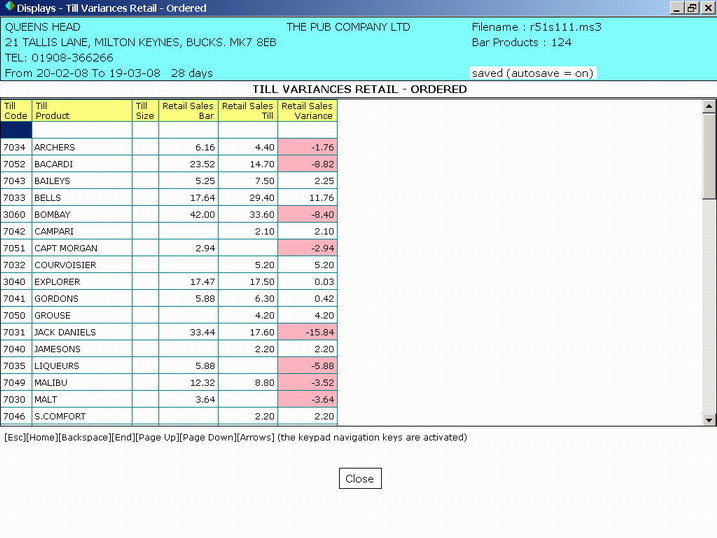
A till analysis can pinpoint the
exact cause of a deficit (or surplus).
The time spent setting up the system to produce variance reports is well worth
it.
After the initial set up, it should only take 10 minutes each time to key in
till slip data and produce the variance reports.
The system can read till data from the files produced by computerized till
systems. This saves typing in the till slip data manually.
![]()
Displays - Till Retail Variances
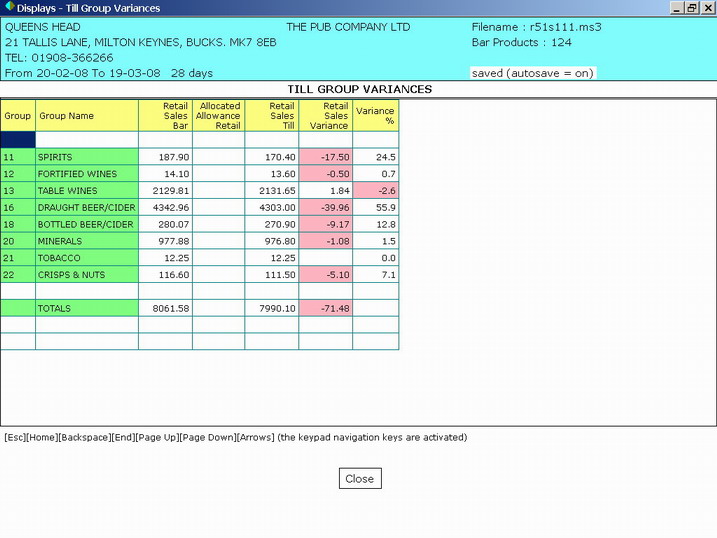
Displays - Till Group Variances
![]()